Garlic Salt and Pepper Roasted Chicken That Is Savory and Simple
Garlic Salt and Pepper Roasted Chicken Recipe
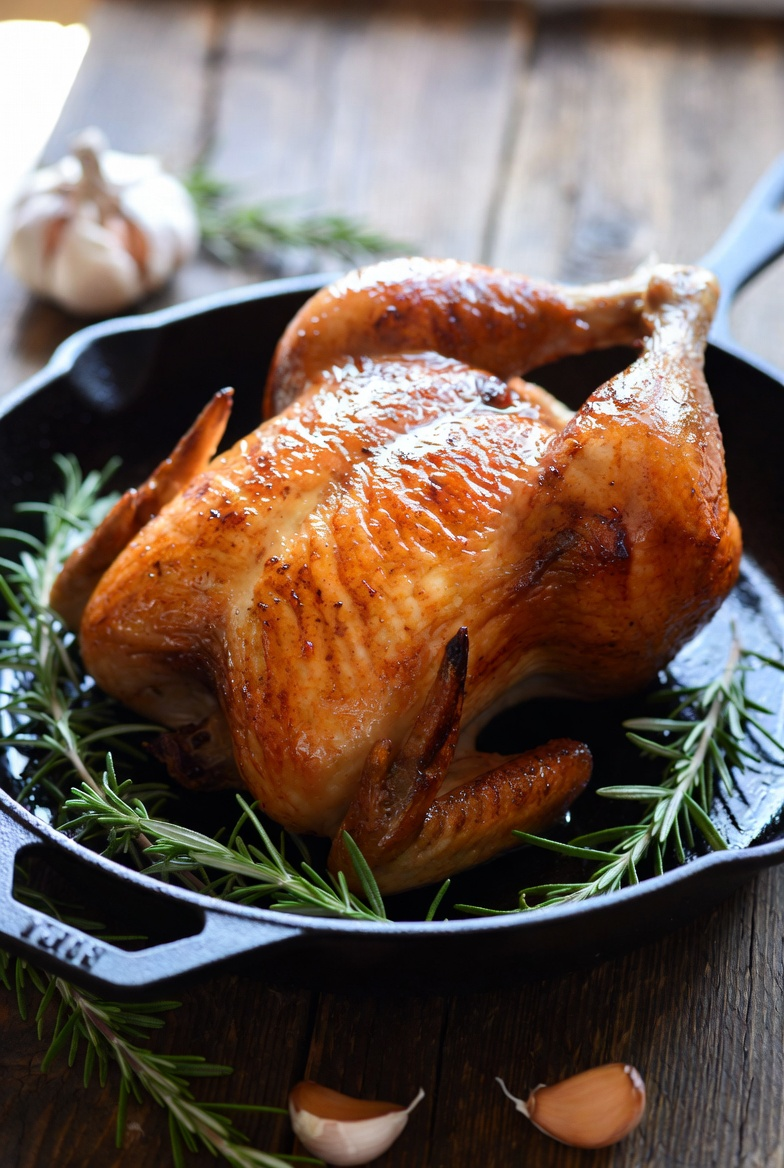
If you are looking for the ultimate easy roasted chicken recipe, you have found it. This garlic salt and pepper roasted chicken has been in my rotation for years — and for good reason. It delivers crispy, golden skin and incredibly juicy meat using just a handful of pantry staples that you probably already have at home.
I have been making roasted chicken since I first started cooking with my mom, and after 20 years of testing different methods, temperatures, and seasonings, I keep coming back to this one. Sometimes the simplest recipes really are the best ones. Garlic, salt, pepper, and high heat — that is all it takes to make a whole chicken that your entire family will fight over.
Whether you are cooking for a weeknight family dinner, hosting a Sunday gathering, or meal prepping for the week ahead, this recipe delivers every single time. The leftovers alone are worth making it — shredded into tacos, tossed into soups, or piled on top of a fresh Caesar salad.
Why This Garlic Roasted Chicken Recipe Works
The secret to a perfect roasted chicken is not a fancy spice blend or a complicated technique. It comes down to three things: dry skin, generous seasoning, and high heat.
- Dry skin is everything. Moisture is the enemy of crispy skin. Patting the chicken completely dry before seasoning is the single most important step in this recipe. I cannot stress this enough.
- Season under the skin. Getting garlic and seasoning directly onto the meat — not just on top of the skin — means flavor in every single bite, not just on the surface.
- 425 degrees is the magic number. High heat renders the fat under the skin quickly and creates that deep golden color and satisfying crunch that makes roasted chicken so irresistible.
Ingredients You Will Need
- 1 whole chicken (3.5 to 4.5 lbs), patted completely dry
- 2 tablespoons olive oil or softened butter
- 6 cloves garlic, minced
- 1.5 teaspoons kosher salt
- 1 teaspoon freshly cracked black pepper
- 1 teaspoon garlic powder
- Fresh herbs for the cavity such as thyme and rosemary (optional but recommended)
- Half a lemon for the cavity (optional)
Step-by-Step Instructions
Step 1: Take the Chill Off
Remove the chicken from the refrigerator about 30 minutes before you plan to cook it. A cold chicken straight from the fridge takes longer to cook through and often results in unevenly cooked meat — crispy on the outside but underdone near the bone. Room temperature chicken cooks much more evenly.
Step 2: Dry It Thoroughly
Preheat your oven to 425 degrees F. While the oven heats up, pat every surface of the chicken completely dry using paper towels — the top, bottom, sides, and inside the cavity. This is non-negotiable for crispy skin.
Step 3: Season Aggressively
Mix the minced garlic with your olive oil or softened butter. Use your fingers to carefully separate the skin from the breast meat and thighs, and rub the garlic mixture directly onto the meat underneath. Then rub the remaining mixture all over the outside of the bird. Combine the salt, pepper, and garlic powder and sprinkle generously over every surface. Do not be shy here — this is a whole chicken and it needs proper seasoning.
Step 4: Prep the Cavity
Stuff the cavity loosely with fresh herbs and a lemon half if using. This adds fragrance and flavor from the inside out as the chicken roasts. Trussing the legs together with kitchen twine is optional but helps the chicken cook more evenly.
Step 5: Roast to Golden Perfection
Place the chicken breast-side up in a cast iron skillet, roasting pan, or oven-safe skillet. Roast at 425 degrees F for 60 to 75 minutes depending on the size of the bird. The chicken is done when a meat thermometer inserted into the thickest part of the thigh (without touching bone) reads 165 degrees F and the juices run clear.
Step 6: Rest Before Carving
This step is where most people go wrong — they cut right into the chicken the moment it comes out of the oven. Let it rest on a cutting board for at least 10 to 15 minutes before carving. This allows the juices to redistribute throughout the meat so every slice is moist and flavorful instead of dry.
Pro Tips for the Best Roasted Chicken Every Time
- Dry brine overnight for extra crispiness. Season the chicken and leave it uncovered in the refrigerator overnight. The salt draws out moisture and then reabsorbs, seasoning the meat deeply while drying the skin to perfection.
- Use a cast iron skillet. Cast iron holds and distributes heat evenly and also doubles as a serving vessel that keeps your chicken warm at the table.
- Baste with pan drippings. Halfway through cooking, spoon some of the rendered pan drippings back over the chicken for extra flavor and color.
- Always use a meat thermometer. Guessing leads to overcooked or undercooked chicken every time. A good instant-read thermometer is one of the best kitchen investments you can make.
- Save the carcass for broth. After you finish the chicken, put the bones in a pot with water, onion, carrots, celery, and herbs. Simmer for a few hours and you have the best homemade chicken broth you have ever tasted.
What to Serve with Roasted Chicken
This garlic roasted chicken is incredibly versatile and pairs well with almost anything. Some of my favorite sides include roasted vegetables, garlic mashed potatoes, steamed rice, or a simple green salad. For a complete Italian-inspired dinner, try it alongside a fresh Caprese salad — the bright tomatoes and mozzarella are a beautiful contrast to the rich roasted chicken.
How to Use Leftover Roasted Chicken
Leftover roasted chicken is one of the most versatile ingredients in your kitchen. Shred the remaining meat and use it in tacos, enchiladas, soups, sandwiches, pasta dishes, or grain bowls. It stays good in an airtight container in the refrigerator for up to 4 days or in the freezer for up to 3 months.
For a quick next-day meal, try using the shredded chicken in our homemade Caesar salad — it transforms leftovers into something that feels completely fresh and new.
Nutritional Information (Per Serving)
Calories: approximately 380 per serving (based on 4 servings) | Protein: 45g | Fat: 22g | Carbohydrates: 2g
Frequently Asked Questions
How long does it take to roast a whole chicken at 425 degrees?
At 425 degrees F, a 3.5 to 4.5 lb chicken takes approximately 60 to 75 minutes. Always verify with a meat thermometer — the internal temperature of the thigh should reach 165 degrees F. Larger chickens (5 lbs and above) may need 80 to 90 minutes.
Should I cover the chicken when roasting?
No — roasting uncovered the entire time is what gives you that crispy, deeply golden skin. Covering the chicken traps steam and results in softer, pale skin rather than the crackling crust everyone loves.
Can I use chicken pieces instead of a whole chicken?
Absolutely. Bone-in, skin-on chicken thighs or drumsticks roasted at 425 degrees F will be perfectly done in about 35 to 45 minutes. Bone-in chicken breasts take around 35 to 40 minutes. Always check the internal temperature.
How do I store leftover roasted chicken?
Allow the chicken to cool completely, then store in an airtight container in the refrigerator for up to 4 days. For longer storage, shred the meat and freeze it in zip-lock bags for up to 3 months.
Can I make this recipe ahead of time?
You can season and prep the chicken up to 24 hours ahead and keep it uncovered in the refrigerator — this actually improves the final result. The chicken itself is best served fresh from the oven but reheats well in a 350 degree oven covered with foil for about 15 minutes.
What if my chicken skin is not getting crispy?
The most common culprits are moisture on the skin and oven temperature that is too low. Make sure you pat the skin completely dry before seasoning, and verify your oven is actually reaching 425 degrees F with an oven thermometer — many home ovens run cooler than the dial suggests.
Garlic Salt and Pepper Roasted Chicken
Ingredients
Method
- Remove chicken from refrigerator 30 minutes before cooking. Preheat oven to 425 degrees F.
- Pat chicken completely dry with paper towels on all surfaces including inside the cavity. This is the most important step for crispy skin.
- Mix minced garlic with olive oil. Rub under the skin, all over the outside, and inside the cavity.
- Combine salt, pepper, and garlic powder. Sprinkle generously over entire chicken.
- Stuff cavity with fresh herbs and lemon half if using. Place breast-side up in a cast iron skillet or roasting pan.
- Roast at 425 degrees F for 60 to 75 minutes until internal temperature reaches 165 degrees F in the thickest part of the thigh.
- Rest for 10 to 15 minutes before carving. This allows juices to redistribute for maximum juiciness.